Category Archives: Resources

Thanks, Iliyan!

In my post about PoDIS now being free, I asked for a volunteer to reformat the two PDFs into a nicer single file. Iliyan Georgiev, a PhD student at the University of Saarland, stepped up and took over. After a few iterations, with Andrew and me providing feedback, he’s made an excellent new version of “Principles of Digital Image Synthesis”. Download this new version from here (right-click and “Save link as…”).

This new version is much superior to the one on Google Books. It’s a single, searchable file (the Google Books version is just a scan without any OCR), it has a hyperlinked table of contents (actually, two of them), and has all errata folded into the text.

Along the way I learned a new trick from Iliyan: you can put PDFs (or any file type at all) into your Google Docs area and make them entirely public, which is how this version of the book is distributed. This is good news for all researchers: you can now host your publications in your own account. No hassling with the I.T. guys to get an account, no fuss if you move to another institution. Now no researcher needs to be held back by “it’s not company policy to give public web space” or other bureaucracy. Having a web site is nicer, but hosting in this way is free and simple. You can host up to a gigabyte for free.

How to Put a Book on Google Books

I asked Andrew Glassner to outline the process he went through to free up his book from his publisher and put it on Google Books. Here’s his reply. I hope this information will encourage anyone else who has authored a book that’s now out-of-print to spend a bit of time and effort to get it out to us all.


If you plan to release your book through Google Books, the most important thing is that you own and control the copyright. Most book publishing contracts state that when the book goes “out of print,” the rights revert to the author. This is usually not automatic: you have to ask the publisher for the rights, and they have to explicitly return them to you. I usually ask for a real, paper letter with a real, human signature on it that states the rights have been returned to me (I don’t know if an email version would carry the same official weight). This is a good time to ask them for any other physical or electronic documents they have for your book, from illustrations to PDFs and so on. They’re usually under no obligation to give you these, but often they’ll give you what they have.

You’ll also need control of at least some “Territorial Rights,” which are discussed below. It’s probably easiest to get the publisher to revert the copyright and territorial rights at the same time.

Note that it’s usually up to the publisher to determine if a book is “out of print” or not. Even if it’s many years old, and they’re not putting ink on paper any more, they may still formally consider the book to be in print. I suggest contacting your publisher and first inquiring if it’s out of print. If they say it isn’t, but you think it should be, ask them why. They might just not have gotten around to giving it that status. Be polite and professional and work with your publisher to establish the status of the book as clearly as possible. When it is out of print, ask to have copyright reverted back to you. If the publisher wants to retain some rights, offer an agreement whereby they revert the rights to you, but you then assign some rights back to them. For example, you might grant them non-exclusive electronic rights, so they can provide the book on their website.

Now that you own the copyright, create an account at the Google books partner program. If you already have a Google account (say with Gmail) you may be able to simply use that; I chose to create a new account. I don’t recall if Google asks you for payment information at this point or not. If you end up charging money for any of your books, Google has to report that income to the IRS (if you’re from outside the US, I don’t know how this works). Although I was planning to release my book for free, I set up my partnership through my one-man LLC. I don’t recall if I had to give them any kind of tax information (e.g., a Federal Taxpayer ID, which is the business equivalent of a Social Security Number) at this point or not.

Once your account is created, choose “Books”. Go to “Add Books” and enter your ISBN. Often, this is the bar code printed on the book. Another source is Amazon, which usually lists the ISBN on the book’s page. Some ISBNs are 10 digits, some are 13. Try all the versions you can find until you get one that Google recognizes as your book.

Click the question mark next to Territorial Rights, look over the options, and enter the rights that you control. Note that the publisher must explicitly relinquish those rights when they return the copyright to you. I don’t know the mechanics of this step, but Google must be checking with someone, somewhere to confirm that you own the rights. When I initially listed my book, I chose “all” for this field, and a few days later Google sent me a nice email stating I didn’t own these rights. I contacted my publisher and explained I was releasing the book through Google Books and needed to control the Territorial Rights (in addition to the copyright they’d already returned to me). They were very nice about it, and a few days later let me know it was done. I don’t know what they did, but it worked.

Google will now ask if you have a PDF or physical book you can send them. I said I did not. They then said that they would let me know if and when they scanned the book in the future. They seem to say this even if they’ve already scanned the entire book. My understanding is that if they’ve scanned any of it, they’ve scanned all of it, even if they’re only displaying a few pages. So I figured that if I gave them some time, their database of scanned-in books would catch up with this request to scan in the book, and the full PDF would appear. That indeed happened about a week later.

At that point your book’s status will go to “Live”. At the far left of your book’s listing (just to the left of the ISBN) there’s a little pencil icon. Click on that. You can now control how much of the book is shown to viewers by choosing a level from the “Book Browsable” drop-down. If you choose 100%, then they will give you the chance to apply one of several different Creative Commons licenses. There’s a nice summary of them right there on the page. I chose “Attribution-Noncommercial,” so that I get credit for my work, nobody can re-sell it for profit, but other people can build upon it.

Let Google digest and process these changes.  They say it can take up to a few days.  Then your book should be ready to share with the world!

“Principles of Digital Image Synthesis” now free for download

Andrew Glassner released his two-volume book “Principles of Digital Image Synthesis” to be free for download from Google Books. This book is pretty amazing in its scope and depth. Published in 1995 by Morgan-Kaufmann Press, it provides an education in almost all the key scientific and mathematical concepts used in rendering. The human vision system and color, display systems (pre-LCD, though), signal processing, sampling and reconstruction, Monte Carlo integration, energy transport, BRDFs, and much more, in 1600 pages. I turned to it for some bits of theory for our first edition. Despite its age, it is a worthwhile volume, as the underlying science and math are still valid.

Update: get a nicer version of the PDF version of the book from Iliyan’s site, or from here. Read more about it here.

Unfortunately, Google Books doesn’t quite list the book correctly and makes it hard to find both volumes when searching. So, here are the direct links:

Just hit the PDF download link in the upper right corner of each page, prove you’re not a computer, and you’ll then have each volume. You’ll want to rename the PDFs, as Google Books calls each volume the same name, Principles_of_digital_image_synthesis.pdf. Volume 1’s PDF is 12.0 MB, Volume 2’s is 17.8 MB.

Finally, to get the errata for the book, go to the author’s page about the book.

Special bonus project: I just asked Andrew Glassner if it would be OK for someone with Acrobat or other editor to put both PDFs into a single PDF, and to fold in the errata. He said that would be great, and that he could provide a bit more new errata which is not on his webpage yet. Let me know if you’re interested in doing a good deed for the graphics community and I’ll coordinate any efforts. Update: looks like we’ve got a volunteer, and so I’m hoping a new PDF version will be available in a few days.

Tools, tools, tools

Last month I mentioned gDEBugger being free and the joys of cppcheck. Here are some others that have crossed my path for one reason or another. Please do let me know (and so let us all know) about any worthwhile tools and libraries I haven’t blogged about – part of the reason for putting out this list is in hopes of learning of tools I haven’t heard of yet.

  • There is now a free version of AQTime, a commercial application that finds memory leaks and performance bottlenecks.
  • The Intel Graphics Performance Analyzers are supposed to be good stuff, and free – you just sign up for the Visual Adrenaline Program. I haven’t used them, but know people that have (hey, there’s Dan Baker on Intel’s page – nice).
  • Intel’s Parallel Inspector, despite its name, is particularly strong at finding memory leaks in any programs. Free month trial.
  • NVIDIA’s Parallel Nsight, also despite its name and focus of its advertising, is not just for CUDA and DirectCompute debugging and analysis, it also works on DirectX 10 and 11 shaders – you’ll need two machines networked together, one to run the shader and the other to control it. The Standard version is free, though when you sign up for it you also get a time-limited “we hope you get hooked” Professional license. Due to a currently-goofy pair of machines in my office (on different networks, and one’s a Mac I use purely as a Windows box), I haven’t gotten to try it out yet, but the demos look pretty great.
  • The Windows Performance Analysis Tools are evidently worthwhile for checking coarse-grained performance and bottlenecks for Windows programs. Again, free. I’ve heard that a number of groups have used xperf to good effect.
  • On an entirely different subject, HLSL2GLSL does a good job of translating most DirectX 9 (only) HLSL shaders to – wait for it – GLSL. Open source, and more info here, which discusses related efforts (like Mojoshader) and translation in the other direction.
  • Not really a tool per se, but still cool to see: here’s a way to find out how much free GPU memory is left for your OpenGL application. Anyone know any way to do this sort of thing with DirectX and Vista/Windows 7?
  • Will WebGL take off? Beats me, but it’s nice to see there’s an inspector, similar to gDEBugger and PIX.
  • GLM is a C++ math library particularly well-suited for use with (but not at all dependent on) OpenGL.
  • Humus points out that the old workhorse PIX now has new functionality that lets you assign names to objects, making debugging easier.
  • While I was messing with his binvox and viewvox programs, Patrick Min pointed out there’s a free 3DS file format library out there, lib3ds. I tried it out and it did the job well, taking very little time for me to integrate into my own private copy of binvox.

Digital Foundry interview with Halo: Reach developers

Halo: Reach was one of the big game releases of 2010, so I was pleased to see a detailed technical interview with some of the developers on Eurogamer‘s Digital Foundry website. I recommend you read the whole thing, but I’ll summarize some of the notable rendering tidbits (the interview also covered multiplayer, AI, and animation):

  • The previous two games (Halo 3 and Halo 3: ODST) used a “semi-deferred” approach, not for deferred lighting or shading but for decals. It sounds like they rendered a cut-down g-buffer (probably just diffuse color) in the first geometry pass (skipping small decoration objects like grass and pebbles), then blended decals into this buffer, and finally rendered the geometry a second time to do the lighting. Halo: Reach changed to a deferred lighting approach. Some lights were deferred and some weren’t, objects without decals or deferred lighting were only rendered once (this “hybrid deferred lighting” sounds similar to what Naughty Dog used for the Uncharted series).
  • Halo 3 used spherical harmonics in lightmaps to store directional lighting information (detailed in a GDC 2008 talk, as well as a SIGGRAPH 2008 course – see slides and course notes). For Halo: Reach, Bungie developed an improved light map representation that gave them “the same support for area light sources, improved contrast, fewer artifacts, a smaller memory footprint and much better performance”. This sounds really interesting; I hope they will describe this further in a conference presentation or article.
  • They developed a particle system which performs scene collisions on the GPU, using the depth and normal buffers as an approximate scene description. it can do tens of thousands of collisions / bounces per frame in 0.3 milliseconds (their previous CPU-based colliding particle system had a budget of 7 collisions per frame!). This system will be presented at GDC 2011 (the presentation will also discuss optimizations to their atmospheric effects system).  This is a great idea – techniques like SSAO use depth/normal buffers as approximate scene descriptions for rendering, but this is the first time I have heard of this being done for simulation.
  • Halo 3 used two 8-bit-per-channel frame buffers with different exposure values for HDR effects (primarily bloom). Bungie described this scheme in a presentation called “HDR the Bungie Way” at two Gamefest conferences: USA in 2006 and Europe in 2007 – the 2006 (giant) zip file also contains an audio recording, but the 2007 one has more updated slides (including screenshots). The GDC 2008 talk mentioned above also discusses this scheme briefly towards the end. In contrast, Halo: Reach uses a single 7e3 buffer; this yields higher performance and frees up more EDRAM for shadow buffers but has less dynamic range (the primary result of this is loss of color in some bloom regions).
  • Instead of MSAA, Halo: Reach uses a simple temporal anti-aliasing method. The camera is offset by a half-pixel in alternate frames, and the last two frames are selectively blended (the blending is turned off on pixels that have moved significantly since the last frame).
  • They developed a new LOD system (to be presented at GDC 2011) which automatically generates low-cost models to be used far from the camera. Combined with improved occlusion culling and GPU occlusion queries, this enabled a significant increase in draw distance.

cppcheck: free, easy, and great

Jari Komppa pointed this tool out to me while we were talking about my previous post on gDEBugger being free. The tool: cppcheck (download here). It’s free, it’s very simple to use, and it’s effective. Install, then run it like so:

cppcheck -q theRootDirectoryOfAllCodeYouWantToCheck

It will then plow through all your C++ files in this directory on down and look for memory allocation/deallocation problems, use of unallocated array elements, and other defects. “-q” means “show me just the errors found”. It does the things your compiler should find but probably doesn’t (someone will no doubt correct me about this for gcc or somesuch, but  I use MS Visual Studio and it’s definitely true for that). For our current project it found about 15 problems, one pretty serious. For an investment of just a few minutes, this free tool caught a number of flaws that weren’t getting caught by other means. One particularly nice feature is that it tries all possible “#ifdef” paths, checking to see if any combinations cause code problems like undefined variables or similar.

I particularly love the fact that I didn’t have to do the usual thing of telling it all about the various include file paths and the eighteen other things I usually have to do to get similar programs working. It was so easy to run that I spent a whole two minutes more and tried it on another group’s project for which I had the code. It turned up a bunch of spots where the codebase needs some repair. Nice! About the only drawback is that the error messages are sometimes a bit terse and take some decoding. It’s open source, and they have specifically asked for help with documentation, so I expect this area will improve over time.

gDEBugger is now free!

Just noticed this on Morgan McGuire’s twitter feed. I don’t know why, but gDEBugger, sort of the PIX equivalent for OpenGL, is now free, go here for a license. They’ll be putting out a newer free version (5.8) by the end of the year, so it’s not like they’re discontinuing the product. Maybe it’s the “get them hooked” business model. Also, there’s talk that the current version doesn’t work that well with OpenGL 3.2 and above. Nonetheless, it’s an excellent product overall. Anyway, screen shots here.

To quote their literature: gDEBugger is an OpenGL, OpenGL ES, and OpenCL Debugger, Profiler and memory analyzer. It traces application activity on top of the OpenGL API to provide the application behavior information you need to find bugs and to optimize application performance. gDEBugger transforms the debugging task of graphic application from a “Black box” into a White box model; using gDEBugger you can peer inside the OpenGL usage to see how individual commands affect the graphic pipeline implementation. gDEBugger has a lot of “standard debugger” abilities, but also contains many special features for graphics software developers: view render context state variables, view allocated textures, textures properties and image data, Shaders programs and source code, break on OpenGL errors. In addition, using its profiling abilities, gDEBugger enables you to pinpoint easily the exact location of the application’s graphic pipeline performance bottleneck to let you optimize the application performance.

Update: Jari Komppa wrote, “This may shed some light on things: http://www.export.gov.il/Eng/_Articles/Article.asp?CategoryID=461&ArticleID=12274

Full text:

AMD to buy Israel’s Graphic Remedy company

The American chip manufacturer AMD is buying Israel’s Graphic Remedy company, the Calcalist financial website reports.

It appears that AMD – Intel’s competitor in manufacturing PC and server chips – will pay a relatively low amount for Graphic Remedy, some $4-5 million.

Graphic Remedy, founded six years ago, is a small company with seven employees. It gained renown for its series of simulation and debugging applications for graphic programs and computer games and became dominant among Cronus’ [sic – they mean Khronos Group’s] Open GL platform developers.

According to Calcalist, AMD seems to be buying Graphic Remedy in an attempt to expand its presence in the home and business graphic
processors market.

They Tried to Make Me Go to Rehab…

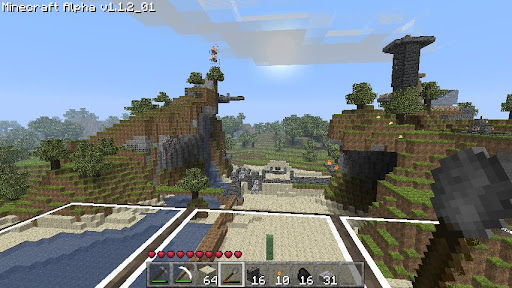
There’s only one way through Minecraft addiction, burning your way through to the other side. At least that’s my current theory. I’ll get back to posting for real after just one more little project… How I did this sculpture is shown here and here, using Patrick Min’s binvox and modified viewvox. Yes, I placed all 2302 cubes by hand; it’s sort of like knitting, with vertigo. You can even take the tour on YouTube.

Really, another Minecraft article?

Here at RTR HQ we like to consider ourselves trailing edge, covering all the stories that have already been slashdotted and boingboinged, not to mention Penny Arcaded. My last post included the simulated 6502 project. The madness/brilliance of this ALU simulator boggles my mind. Yes, Minecraft is awesome, and for the low low price of $13.30 it’s had me in its terrible grasp for the past week, e.g. this.

I wanted to run through a few graphical bits about it. First, the voxel display engine is surprisingly fast for something that runs in the browser. Minecraft uses the Lightweight Java Game Library to drive OpenGL. Max McGuire figures that the program tracks the visible faces, i.e. all those between air and non-air, and then brute-force displays all these faces (using backface culling) within a given distance. The file format keeps track of 16x16x128 (high) chunks, so just the nearby chunks need display. I don’t know if the program’s using frustum culling on the chunks (I’d hope so!). Looks like no occlusion culling is done currently. The lighting model is interesting and nicely done, we haven’t quite figured it out; the game’s author, “Notch” (Markus Persson), notes that it was one of the trickier elements to make work efficiently.

Me, I’ve been looking at voxelization programs out there, to see if there’s a good one for turning models into voxel building plans (it’s a sickness, seriously). Patrick Min’s binvox (paired with his viewvox viewer) looks promising, since Patrick’s a good programmer (e.g., his CalcuDoku app), the program’s been around 6 years, and it’s open-source. Binvox uses the GPU to generate the voxel views, so it’s quite fast. It supports both parity counting and “carving”, and can also remove fully-interior voxels after processing. Parity count is for “watertight” models (closed and manifold, i.e. the polygon mesh correctly defines a solid object without gaps or self-intersections, etc.). Carving is taking 6 views and recording the closest occupied voxel from each direction. It won’t give you holes or crevices you can’t see from the 6 directions, but is otherwise good for polygonal models that are just surfaces, i.e., that don’t properly represent solids. See his page for references to all techniques he uses. I found a bug in Patrick’s OBJ reader yesterday and he fixed it overnight (fast service!), so I’m game to give it another go tonight.

Quick Gaussian Filtering

There are two speed tricks with Gaussian filtering using the pixel shader. The first is that the Gaussian filter (along with the box filter) is separable: you can filter horizontally, then vertically (or vice versa, of course). So for a 9×9 filter kernel you then have 18 texture samples in 2 passes instead of 81 samples in a single pass. The second trick is that each of the samples you use can actually be in-between two texels, e.g. if you need to sample texels 1 through 9, you could sample just once in between 1 and 2 and use the GPU to linearly interpolate between the two, between 3 and 4, etc., for a total of 5 samples. So instead of 18 samples you could get by with 10 samples. This is old news, dating back to at least ShaderX2 and GPU Gems, and we talk about it in our 3rd edition around page 469 on.

Some bits I didn’t know were discussed by this article by Daniel Rákos in his article, and also coded up by JeGX in a GLSL shader demo collection. First, I hadn’t thought of using the Pascal’s triangle numbers as the weights for the Gaussian (nice visualization here). To be honest, I’m not 100% sure that’s right, seems like you want the area under the Gaussian’s curve and not discrete samples, but the numbers are in the ball park. It’s also a heck of a lot easier than messing with the standard deviation; let’s face it, it’s a blur and we chop off the ends of the (infinite) Gaussian somewhat arbitrarily. That said, if a filtering expert wants to set me straight, please do.

The second tidbit: by using the linear interpolation trick, this shader was found to be 60% faster. Which sounds about right, if you assume that the taps are the main cost: the discrete version uses 9 taps, the interpolated version 5. Still, guessing and knowing are two different things, so I’m now glad to know this trick actually pays off for real, and by a significant amount.

The last interesting bit I learned was from a comment by heliosdev on Daniel’s article. He noted that computing the offset locations for the texture samples once (well, 4 times, one for each corner) in the vertex shader and passes these values to the pixel shader is a win. For him, it sped the process by 10%-15% on his GPU; another commenter, Panos, verified this result with his own benchmarks. Daniel is planning on benchmarking this version himself, and I’ll be interested what he finds. Daniel points out that it’s surprising that this trick actually gives any benefit. I was also under the impression that because texture fetches take so long compared to floating-point operations, that you could do a few “free” flops (as long as they weren’t dependent on the texture’s result) in between taps.

Long and short, I thought this was a good little trick, though one you want to benchmark to make sure it’s helping. Certainly, constants don’t want to get passed from VS to PS, that sort of thing gets optimized by the compiler (discussed here, for example). But I can certainly imagine computing numbers in the VS and passing them down could be more efficient – my main worry was that the cost of registering these constants in the PS inputs might have some overhead. You usually want to minimize the number of registers used in a PS, so that more fragments can be put in flight.