| HOW TO EDIT
MODELS IN BATTLEFIELD: 1942
Updated: October 11th 2003 |
| In
this tutorial, you will learn how to modify models for Battlefield
Models
for Battlefield are stored primarily in the standardMesh.rfa
archive. The two major formats in use are .sm and .tm.
Tools to import and export Battlefield models were included
with the Battlefield mod developer's kit. The tools are
written for 3D Studio Max version 5.1
Requirements:
- You have already completed the tutorial on creating a
mod with the Mod Wizard.
- You own a copy of 3D Studio Max 5.1 or higher. |
| |
1.
|
Install
the 3dsmax toolset from the mod developer's kit by running
the 3dsmax toolset installer program. |
| 2. |
Load
up 3dsmax and you will find a new menu named "Battlefield
Tools", choose RFA Tools from the Battlefield Tools menu.

|
| 3. |
Choose
Open .rfa from the File menu

|
| 4. |
Browse
to the /mods/bf1942 folder. The "bf1942" folder has Battlefield's
data files for a normal game.

|
| 5. |
Choose "standardMesh.rfa" and
press Open.

|
| 6. |
Select
the files Colt_base_m1.rs and Colt_base_m1.sm. These files
are part of the colt pistol weapon. The .rs text file containing
shader information as show in the window below, the .sm
file is the geometry data file that contains the mesh data.
From the Extract menu choose Selected.

|
| 7. |
Select
the My_Mod folder in the Browse for Folder dialog and press
OK.

|
| 8. |
In
3dsmax choose Model Import/Export from the Battlefield Tools
menu

|
| 9. |
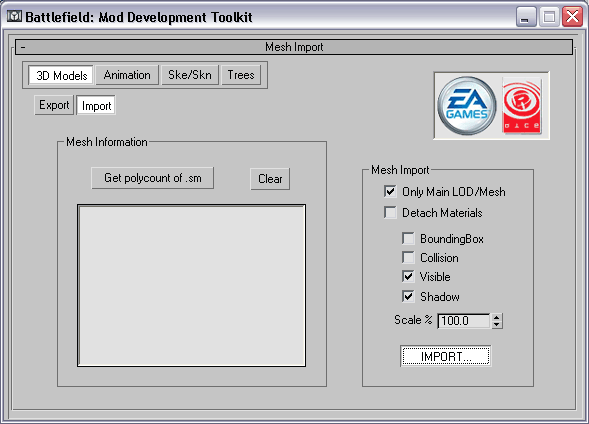
Press
the Import button under 3D Models to bring up the Mesh Import
dialog screen. Set your options to Only Main LOD/Mesh, Visible,
and Shadow then press the IMPORT... button.
|
| 10. |
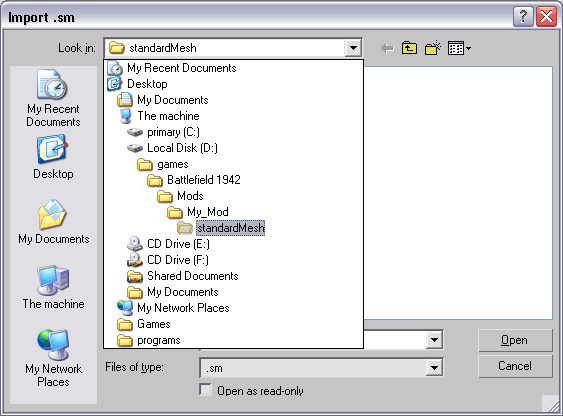
Browse
to the /My_Mod/standardMesh directory.
|
| 11. |
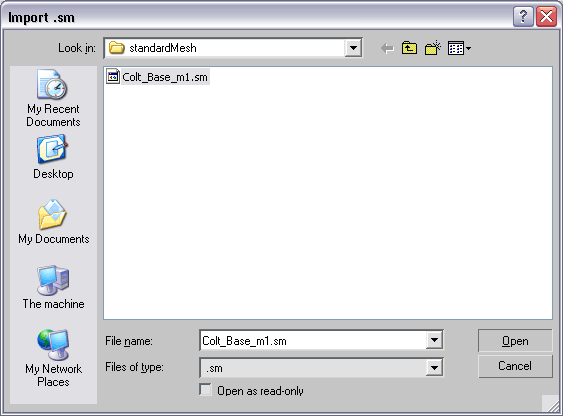
Select "Colt_Base_m1.sm" and
press Open
|
| 12. |
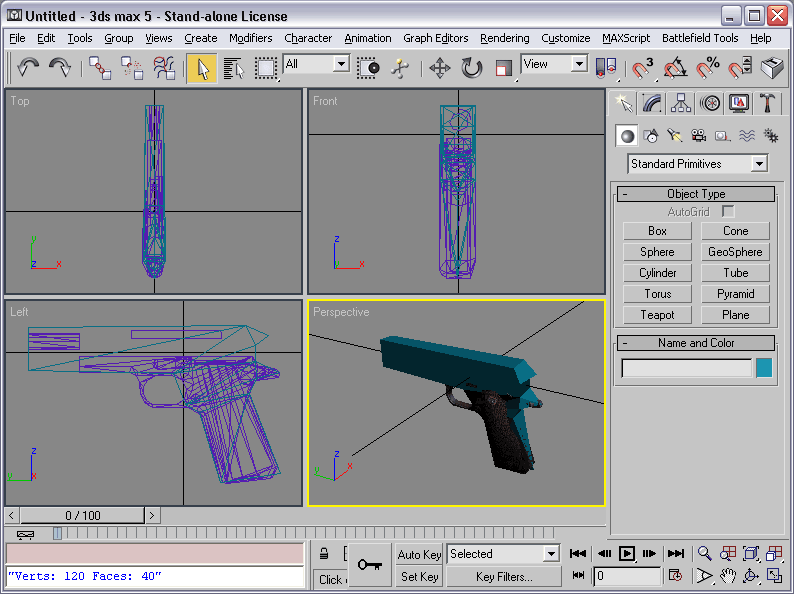
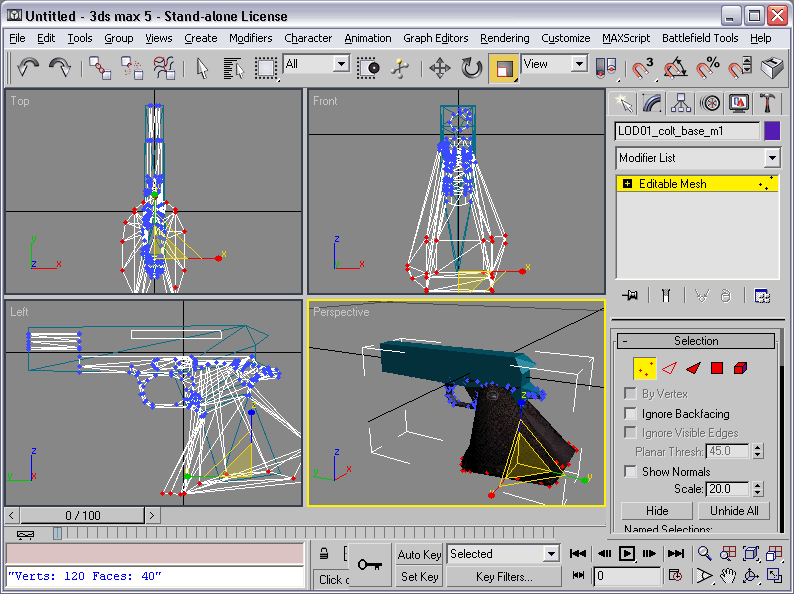
Here
is how the model looks imported into 3dsmax.
|
| 13. |
Set
modify mode and sub object vertex on the LOD01_colt_base_m1
node. Then use the selection and scale too to deform the
mesh into an odd shape. This is so we can see that we have
changed the model in game.
|
| 14. |
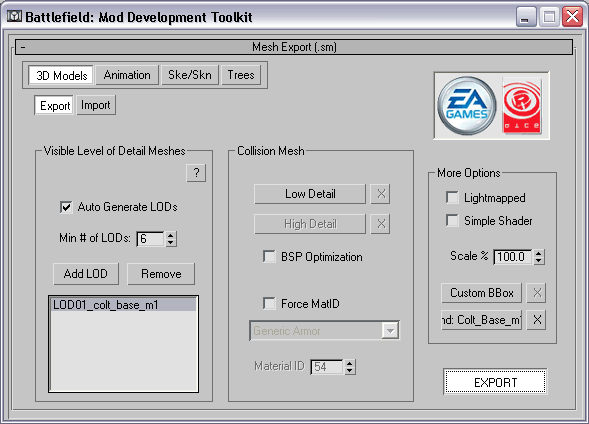
Goto
the export 3d model screen and press Add LOD, then pick
the LOD01_colt_base_m1 node. This is the primary visible
model. Check Auto Generate LODs and set the Min # of LODs
spinner to 6, this will tell the exporter to generate 5
additional meshes of progressively lower detail to use.
LOD meshes are used to increase game performance by switching
to lower detail versions of the primary visible model when
the camera is further away from the object.
Make
sure Simple Shader is unchecked if you wish to have all
the material settings exported.
Pick
the Colt_base_m1_ node as the shadow geometry. This model
will be used to cast real-time 3d shadows onto the terain
while in game.
You
can now press the export button and choose the existing
Colt_base_m1.sm file inside My_Mod/Standard mesh as the
filename.
|
| 15. |
Press
yes to the dialog box that pops up to overwrite the existing
file

|
| 16. |
In
/my_mod/archives/ run PackRfa.exe, select standardMesh from
the folder drop down list and press the Pack Folder button.

|
| 17. |
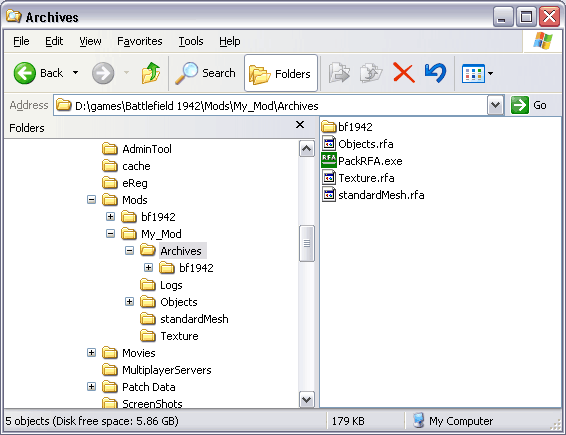
Here
is a screen shot of the My_Mod/Archives directory with the
file archive standardMesh.rfa packed.
|
| 18. |
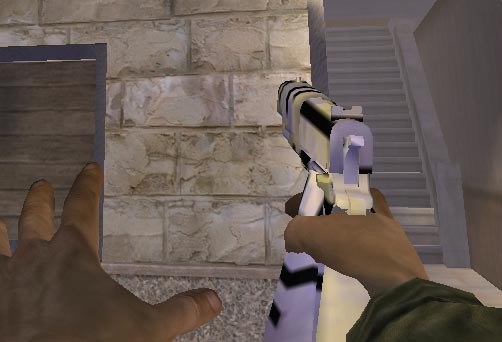
Here
is how the new colt model looks in game:
|
| |
|
| |
--
End of Tutorial -- |

